Section 5.2 cataloged the libraries Part I sits on: the deep-learning engine, the numerical substrate, classical ML, the Hugging Face Hub, and the essential Python libraries. This section is hands-on: the scripting patterns you reach for every day (loading a model with device mapping, generation, batching), the steps that link CUDA to PyTorch, the install commands that match versions, and the verification snippets that prove the stack is healthy end-to-end.
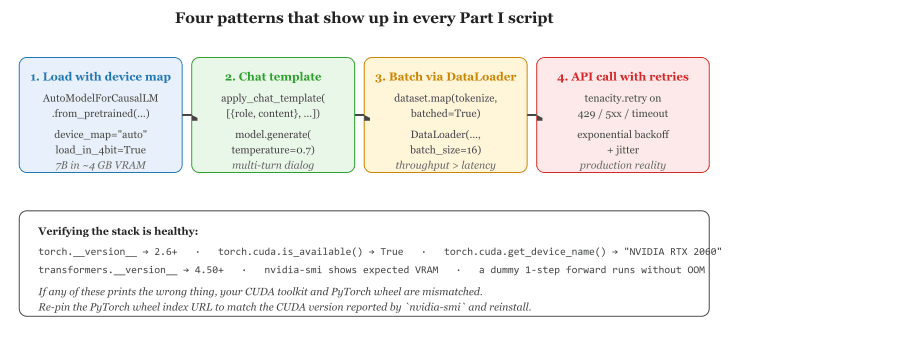
device_map="auto", apply a chat template for prompts, batch through a DataLoader for throughput, and wrap remote API calls with retry logic. The verification block below catches the most common stack-health failure: a CUDA / PyTorch version mismatch.Common Patterns for LLM Scripting
Certain code patterns appear so frequently in LLM work that they are worth memorizing. This section collects the most important ones. Code Fragment G.4.1 below puts this into practice.
Pattern 1: Loading a Model with Automatic Device Mapping
This snippet loads a causal language model with automatic device placement and 4-bit quantization using Hugging Face Transformers.
# PyTorch implementation
from transformers import AutoModelForCausalLM, AutoTokenizer

model_name = "mistralai/Mistral-7B-Instruct-v0.3"

tokenizer = AutoTokenizer.from_pretrained(model_name)
model = AutoModelForCausalLM.from_pretrained(
    model_name,
    torch_dtype="auto",         # automatically choose float16/bfloat16
    device_map="auto",           # spread across available GPUs
    load_in_4bit=True,           # 4-bit quantization to save memory
)device_map="auto" to spread layers across available GPUs and load_in_4bit=True to compress weights from 16-bit to 4-bit, reducing memory from ~14 GB to ~4 GB for a 7B model.Pattern 2: Chat-Style Inference with Templates
This snippet applies a chat template to a multi-turn conversation and generates a response from the model.
# Most modern models use chat templates
messages = [
    {"role": "system", "content": "You are a helpful coding assistant."},
    {"role": "user", "content": "Write a Python function to compute Fibonacci numbers."},
]

# Apply the model's chat template
prompt = tokenizer.apply_chat_template(messages, tokenize=False, add_generation_prompt=True)
inputs = tokenizer(prompt, return_tensors="pt").to(model.device)

# Generate
outputs = model.generate(**inputs, max_new_tokens=256, temperature=0.7, do_sample=True)
response = tokenizer.decode(outputs[0][inputs["input_ids"].shape[1]:], skip_special_tokens=True)
print(response)apply_chat_template() to format a multi-turn conversation into the model's expected token format. The slice outputs[0][inputs["input_ids"].shape[1]:] strips the prompt tokens from the generated output.Pattern 3: Batch Processing with a DataLoader
This snippet tokenizes a dataset in batches and wraps it in a PyTorch DataLoader for efficient iteration.
# implement tokenize_fn
from torch.utils.data import DataLoader
from datasets import load_dataset

# Load a dataset
dataset = load_dataset("imdb", split="test")

# Tokenize in batches
def tokenize_fn(examples):
    return tokenizer(examples["text"], truncation=True, padding="max_length", max_length=512)

tokenized = dataset.map(tokenize_fn, batched=True, batch_size=64)
tokenized.set_format("torch", columns=["input_ids", "attention_mask", "label"])

# Create a DataLoader for efficient batched iteration
loader = DataLoader(tokenized, batch_size=16, shuffle=False)Pattern 4: API Calls with Retry Logic
This snippet wraps an OpenAI API call with exponential backoff to handle rate limits gracefully.
# implement call_with_retry
import time
from openai import OpenAI

client = OpenAI()

def call_with_retry(prompt, max_retries=3, base_delay=1.0):
    """Call the API with exponential backoff on rate limits."""
    for attempt in range(max_retries):
        try:
            response = client.chat.completions.create(
                model="gpt-4o",
                messages=[{"role": "user", "content": prompt}],
                temperature=0.7,
            )
            return response.choices[0].message.content
        except Exception as e:
            if "rate_limit" in str(e).lower() and attempt < max_retries - 1:
                delay = base_delay * (2 ** attempt)
                print(f"Rate limited. Waiting {delay}s...")
                time.sleep(delay)
            else:
raisefrom transformers import AutoModelForCausalLM
from transformers import AutoTokenizer
# Save a fine-tuned model
model.save_pretrained("./my-finetuned-model")
tokenizer.save_pretrained("./my-finetuned-model")
# Load it back later
model = AutoModelForCausalLM.from_pretrained("./my-finetuned-model")
tokenizer = AutoTokenizer.from_pretrained("./my-finetuned-model")
# Push to Hugging Face Hub
model.push_to_hub("your-username/my-finetuned-model")
tokenizer.push_to_hub("your-username/my-finetuned-model")Pattern 5: Saving and Loading Checkpoints
This snippet saves a fine-tuned model and tokenizer to disk, reloads them, and pushes them to the Hugging Face Hub.
# Save a fine-tuned model and tokenizer to a local directory,
# then reload them and push to the Hugging Face Hub for sharing.
# Requires: pip install transformers huggingface-hub
from transformers import AutoModelForCausalLM, AutoTokenizer

# Save both model weights and tokenizer files to a local directory
model.save_pretrained("./my-finetuned-model")
tokenizer.save_pretrained("./my-finetuned-model")

# Reload the checkpoint later in any session
model = AutoModelForCausalLM.from_pretrained("./my-finetuned-model")
tokenizer = AutoTokenizer.from_pretrained("./my-finetuned-model")

# Push to the Hub so others can use it with from_pretrained("your-username/...")
model.push_to_hub("your-username/my-finetuned-model")
tokenizer.push_to_hub("your-username/my-finetuned-model")Thanks to the pipeline API, you can run a language model in two lines of Python: one to create the pipeline, one to call it. The entire transformer architecture, tokenization, and decoding are handled behind the scenes. This is both a blessing (rapid prototyping) and a danger (it is easy to treat the model as a black box without understanding its behavior).
Python Toolkit Summary
transformersis your primary interface to pretrained models. Learn itsAutoclasses andpipelineAPI first.- Use Conda for GPU environments (it manages CUDA) or uv for speed. Always use a virtual environment.
- Jupyter notebooks for exploration; Python scripts for production. Always validate notebooks by running all cells from scratch.
- Master the five patterns: model loading, chat templates, batch processing, API retry, and checkpoint management.
- The Hugging Face ecosystem (
datasets,peft,trl,accelerate) covers the full LLM lifecycle from data to deployment.
What Comes Next
Continue to Section 5.1 (Essential Python Libraries) for the next reference appendix in this collection.
Linking CUDA to PyTorch
Generic Python virtual environment setup (venv, conda, uv, pixi) is covered in Section 5.2 (Libraries & Frameworks). This section focuses on the CUDA-specific overlay: choosing the correct PyTorch wheel for your driver, picking a conda channel that bundles the right toolkit, and avoiding the version mismatches that cause silent CPU-only fallbacks. Set up your virtual environment per H.2, then return here to install GPU-aware PyTorch.
The single biggest source of "CUDA not available" frustration is a PyTorch wheel that does not match the installed NVIDIA driver. PyTorch publishes separate wheels for each supported CUDA runtime (currently cu118, cu121, cu124, and newer); installing the default wheel from PyPI gives you a CPU-only build. To get a GPU build, you must explicitly point pip at the matching index URL, or use the conda pytorch-cuda meta-package.
Option A: Conda with the pytorch-cuda Channel
Conda bundles the CUDA runtime libraries inside the environment, so you do not need a system-wide CUDA toolkit installation. The -c nvidia channel provides the matching runtime for each PyTorch build.
# Activate the environment created per H.2, then install GPU-aware PyTorch.
# The pytorch-cuda meta-package pins the CUDA runtime to a matching wheel.
conda install pytorch torchvision torchaudio pytorch-cuda=12.4 -c pytorch -c nvidiapytorch-cuda=12.4 meta-package selects the matching cuDNN, NCCL, and CUDA runtime versions.Option B: pip with the CUDA Wheel Index
If you prefer venv + pip, the critical detail is the --index-url flag. Without it, pip pulls the default CPU-only wheel from PyPI. With it, pip pulls the matching CUDA build from PyTorch's hosted index.
# In your activated venv (set up per H.2):
# CUDA 12.4 wheels. Check https://pytorch.org/get-started/locally/ for current versions.
pip install torch torchvision torchaudio --index-url https://download.pytorch.org/whl/cu124

# Verify the GPU build is active and CUDA is visible.
python -c "import torch; print(torch.cuda.is_available(), torch.version.cuda)"--index-url argument is what distinguishes a GPU-enabled install from a silent CPU-only fallback.Matching the Wheel to Your Driver
PyTorch wheels embed a specific CUDA runtime version. The NVIDIA driver on your host must be at least as new as the runtime version embedded in the wheel; older drivers cannot load newer CUDA libraries. Run nvidia-smi to see the maximum CUDA runtime your driver supports (the value in the top-right of the table). Then pick a PyTorch wheel whose runtime version is at or below that.
| Driver minimum | PyTorch wheel suffix | Notes |
|---|---|---|
| 525.60+ | cu121 | Stable on most cloud GPUs through 2024. |
| 550.54+ | cu124 | Default recommendation for new installs in 2026. |
| 560.28+ | cu126 | Required for Blackwell (RTX 50-series, B100) GPUs. |
If you train on multiple GPUs, the NCCL version bundled with the PyTorch wheel must match across all nodes in a distributed run. Pin the same wheel suffix (cu124 everywhere, not a mix of cu121 and cu124) and the same PyTorch minor version to avoid the collective-operation hangs that NCCL mismatches cause.
Always record the exact CUDA wheel suffix and PyTorch version in your requirements.txt or environment.yml (for example, torch==2.5.1+cu124). Different wheel suffixes produce numerically different results on the same GPU due to differing cuDNN kernels, and unpinned installs can silently downgrade you to a CPU build when the index URL is forgotten.
Installing Key Libraries
With PyTorch installed, the remaining libraries install easily via pip. Here is a comprehensive installation for the full textbook experience:
# Core Hugging Face ecosystem
pip install transformers datasets tokenizers accelerate

# Fine-tuning and alignment
pip install peft trl bitsandbytes

# Inference serving
pip install vllm

# RAG and embeddings
pip install sentence-transformers langchain langchain-openai langchain-community langchain-text-splitters chromadb

# Experiment tracking
pip install wandb mlflow

# Data processing
pip install pandas numpy scikit-learn

# Jupyter notebooks
pip install jupyterlab ipywidgets
# Install vLLM (Linux only, or WSL2 on Windows)
pip install vllm
# Start a local inference server
python -m vllm.entrypoints.openai.api_server \
--model meta-llama/Llama-3.1-8B-Instruct \
--dtype auto \
--max-model-len 4096Parts 1 and 2 (Foundations, Understanding LLMs): pip install torch transformers datasets numpy
Part 3 (Working with LLMs): Add openai langchain langchain-openai
Part 4 (LLM Training and Adaptation): Add peft trl bitsandbytes accelerate wandb
Part 5 (Retrieval and Conversation with LLMs and Agents): Add sentence-transformers chromadb langchain-community langchain-text-splitters
Parts 6 and 7 (Agents, Production): Add vllm mlflow
Installing vLLM
vLLM requires Linux and a CUDA-compatible GPU. It does not currently support Windows natively (use WSL2 on Windows). Code Fragment H.4.2 below puts this into practice.
# Install vLLM (Linux or WSL2 only; requires a CUDA-compatible GPU).
# vLLM starts an OpenAI-compatible REST API server for local inference.
pip install vllm

# Launch the server; it will download the model weights on first run
python -m vllm.entrypoints.openai.api_server \
    --model meta-llama/Llama-3.1-8B-Instruct \
    --dtype auto \
--max-model-len 4096Verifying Your Setup
After completing the installation steps, run this verification script to confirm everything is working. Save it as verify_setup.py and run it in your activated environment.
"""
LLM Environment Verification Script
Run this to confirm your setup is ready for the textbook exercises.
"""
import sys

def check_python():
    v = sys.version_info
    assert v.major == 3 and v.minor >= 10, f"Need Python 3.10+, got {v.major}.{v.minor}"
    print(f"[OK] Python {v.major}.{v.minor}.{v.micro}")

def check_torch():
    import torch
    print(f"[OK] PyTorch {torch.__version__}")
    if torch.cuda.is_available():
        print(f"[OK] CUDA {torch.version.cuda}, GPU: {torch.cuda.get_device_name(0)}")
        vram = torch.cuda.get_device_properties(0).total_mem / 1e9
        print(f"     VRAM: {vram:.1f} GB")
    else:
        print("[WARN] No CUDA GPU detected. CPU-only mode.")

def check_transformers():
    import transformers
    print(f"[OK] Transformers {transformers.__version__}")

def check_optional(name):
    try:
        mod = __import__(name)
        version = getattr(mod, "__version__", "installed")
        print(f"[OK] {name} {version}")
    except ImportError:
        print(f"[SKIP] {name} not installed (optional)")

def test_inference():
    """Quick smoke test: load a tiny model and generate one token."""
    from transformers import pipeline
    gen = pipeline("text-generation", model="sshleifer/tiny-gpt2", device="cpu")
    output = gen("Hello", max_new_tokens=5)
    assert len(output[0]["generated_text"]) > 0
    print("[OK] Inference smoke test passed")

if __name__ == "__main__":
    print("=== LLM Environment Check ===")
    check_python()
    check_torch()
    check_transformers()

    for lib in ["datasets", "peft", "trl", "bitsandbytes", "wandb", "vllm"]:
        check_optional(lib)

    print("\n=== Smoke Test ===")
    test_inference()

print("\n=== All checks complete! ===")Expected output on a properly configured machine with an NVIDIA GPU:
# Experiment tracking setup
=== LLM Environment Check ===
[OK] Python 3.11.7
[OK] PyTorch 2.5.1
[OK] CUDA 12.4, GPU: NVIDIA GeForce RTX 4090
     VRAM: 24.0 GB
[OK] Transformers 4.47.0
[OK] datasets 3.3.0
[OK] peft 0.14.0
[OK] trl 0.13.0
[OK] bitsandbytes 0.45.0
[OK] wandb 0.19.1
[SKIP] vllm not installed (optional)

=== Smoke Test ===
[OK] Inference smoke test passed

=== All checks complete!Python: 3.11.7
PyTorch: 2.4.0+cu124
CUDA available: True
CUDA device: NVIDIA RTX 4090 (24.0 GB)
Transformers: 4.45.2
Datasets: 3.0.1
Accelerate: 1.0.1
PEFT: 0.13.0In a 2023 survey of ML practitioners, environment setup was ranked as the second most time-consuming part of starting a new project (after data cleaning). The good news: once you have a working environment, you can clone it, export it, and reuse it across projects. The initial investment pays dividends for months.
Setup Checklist
- Confirm your GPU has enough VRAM for your target model size (see Section H.1 table).
- Install your IDE and editor integrations per Section H.6, and lock down API keys with the patterns in Section 16.1 before running anything that touches a paid endpoint.
- Install the latest NVIDIA driver and verify with
nvidia-smi. - Use Conda to create an isolated environment with the correct CUDA version.
- Install PyTorch first, then
transformersand other libraries. - Run the verification script to confirm everything works end to end.
- For cloud work, start with Google Colab (free T4) and scale to RunPod or Lambda as needed.
- Set
HF_HOMEto control where model weights are cached on disk.
If you accidentally commit a large model file to Git, simply deleting it in a later commit does not fix the problem; the file remains in Git's history and inflates the repository forever. Use git filter-branch or the BFG Repo Cleaner to remove large files from history. Better yet, set up your .gitignore before your first commit.
Git LFS for Large Files
When you do need to version large files (specific model checkpoints that are part of your deliverable, for instance), Git Large File Storage (LFS) replaces them with lightweight pointers in the repository while storing the actual file contents on a remote server. Code Fragment I.1.2 below puts this into practice.
# Configure Git LFS to track large model files.
# LFS replaces large binaries with lightweight pointers in your repo and
# stores the actual blobs in remote LFS storage.
git lfs install

# Track common ML weight formats. Edit .gitattributes after running these.
git lfs track "*.safetensors"
git lfs track "*.bin"
git lfs track "*.pt"
git lfs track "*.ckpt"

# Commit the .gitattributes config so collaborators inherit it
git add .gitattributes
git commit -m "Track large model files with Git LFS"

# Normal workflow continues; LFS handles the size-aware upload/download
git add my-finetuned-model/model.safetensors
git commit -m "Add fine-tuned model"
git push.safetensors, .bin). LFS replaces these files with lightweight pointers in the repository and stores the actual data on a remote server.Hugging Face Hub uses Git LFS under the hood for all model repositories. When you push a model with model.push_to_hub(), it is automatically stored via LFS.
Branching Strategy for ML
A practical branching strategy for ML projects:
- main: Stable, tested code and configurations. Every merge to main should produce reproducible results.
- experiment/[name]: Each experiment gets its own branch. Include the date or a short description:
experiment/lora-r16-lr2e4. - data/[name]: Branches for data processing pipeline changes.
- feature/[name]: New features in the codebase (new evaluation metrics, new data loaders).